As a relative n00b to the world of web development, I don't have much experience deploying production-level apps. As a student at the Flatiron School, I became familiar with using Heroku to deploy and host my Rails applications. After graduating Flatiron, I continued to use Heroku for both Rails and Ember deployments. It's an amazing platform that makes deployment easy for beginners like myself. I use it for my own deployments and I always recommend that my students at Flatiron use it.
Heroku does have some limitations, however. It provides limited database storage and limited support for file uploads and temporary file storage. Hosting our apps on our own servers, on the other hand, gives us total control over this and much more. So, I began exploring DigitalOcean.
I first tried to deploy a Rails application using the 1-click Ruby on Rails installation that DO offers. I failed. Hard. A friend then turned me on to using Dokku to deploy to DigitalOcean. Dokku is "Docker powered mini-Heroku". It allows you to deploy your app to your very own DigitalOcean server using git. It abstracts away most of the nitty-gritty work of configuring your server and your app for production. For someone who knows very little about that nitty-gritty work (me), or anyone who doesn't wan't to engage in unnecessary nitty-gritty technical work (everyone ever), it's the perfect tool. If you're interested in using Dokku to deploy to your DO server, I highly recommend this blog post by my friend and former classmate, Dan Visintainer.
After successfully using Dokku a handful of times for my DigitalOcean deployments, I felt the time had come to stop avoiding the technical nitty-gritty. I often caution my students to avoid using certain gems, like Devise, until they understand the functionality that the gem is offering and can build it out for themselves. Over this past weekend, I decided it was time to practice what I preach, and deploy to DigitalOcean, the hard way. No Dokku, no 1-click installation, just me, my droplet, and a million different tutorials.
After several hours of piecing together 6+ blog posts and articles, I had finally deployed a super-important cat cataloguing app:
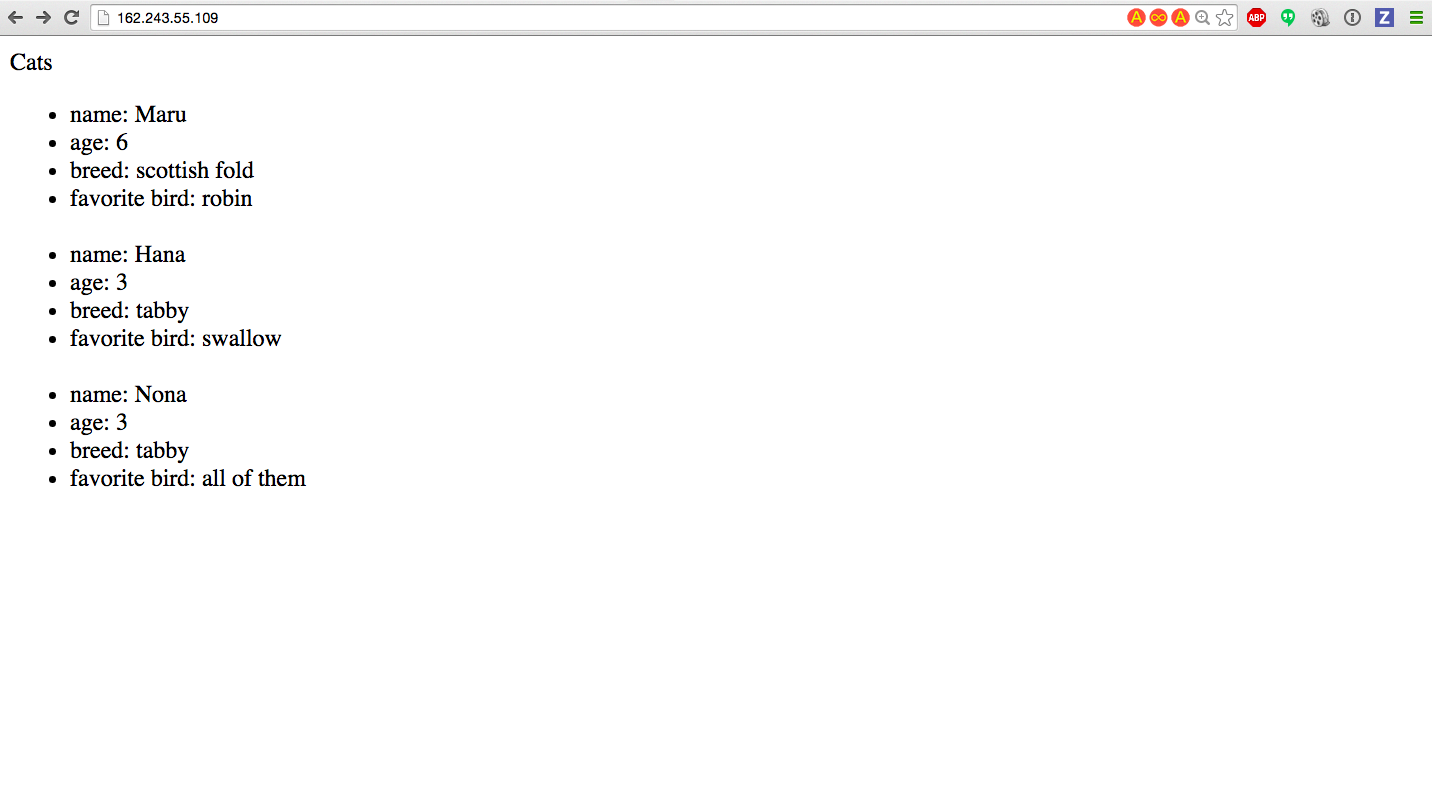
As someone that's never deployed to DigitalOcean without the help of Dokku, I found myself really feeling the lack of a guide that would take me through the process from square zero to finish. So, I decided to make one myself!
Part I: Configuring The Server
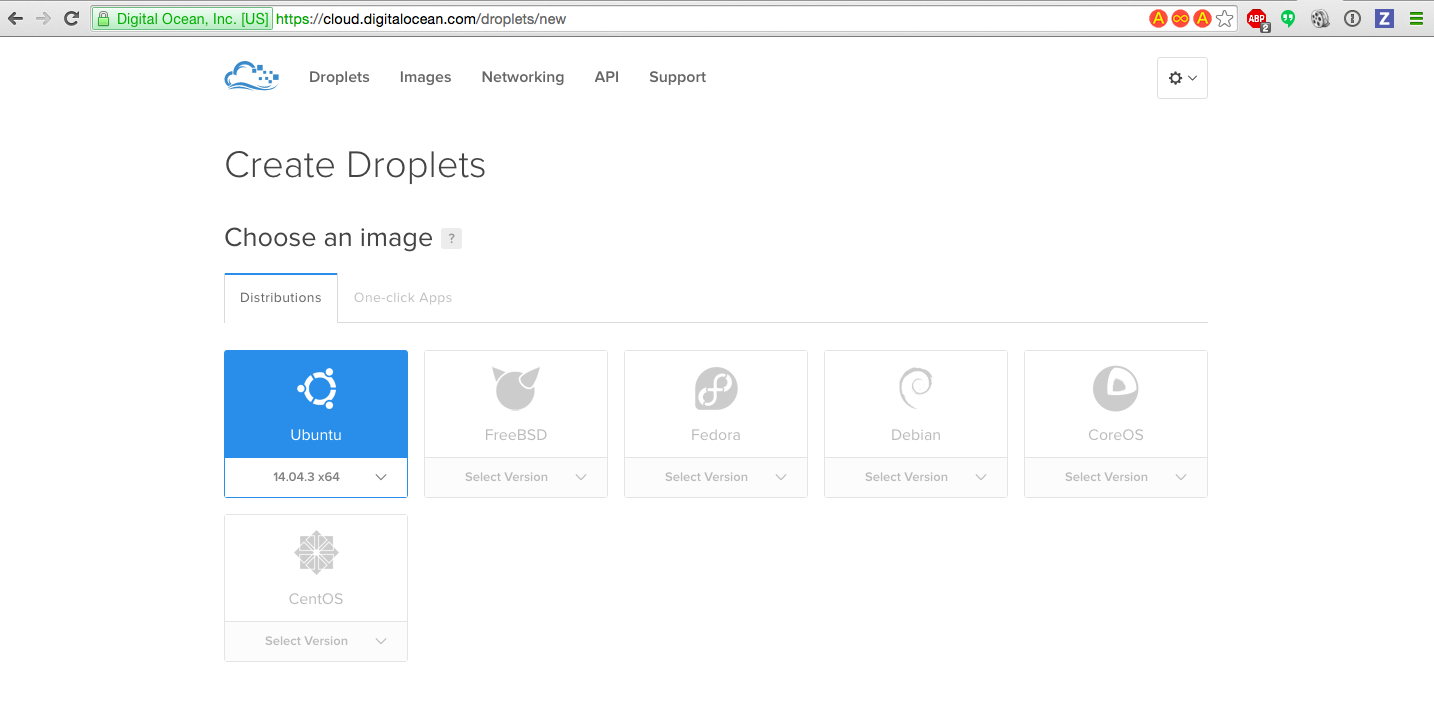
Create Your Droplet
Once you sign up for your DO account, click the "create droplet" button. Create a new droplet with an Ubuntu installation:
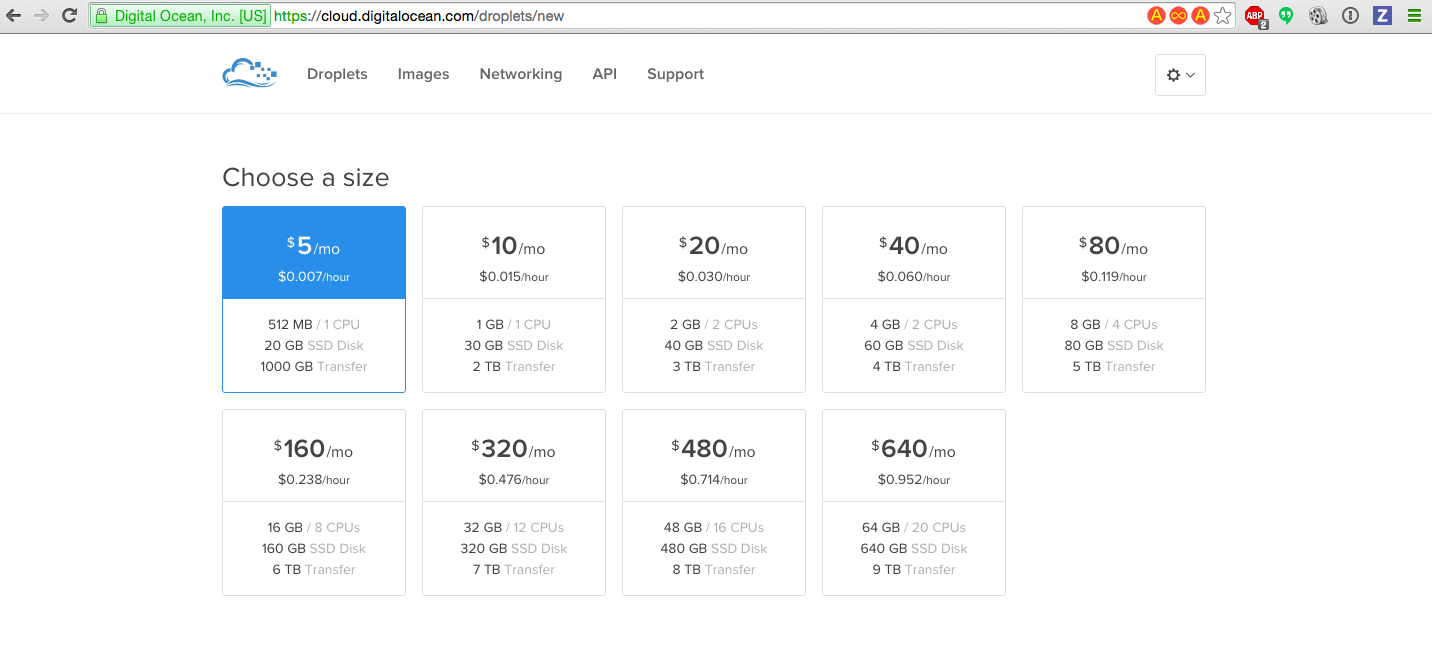
Then, choose a size and a data center region:
 .
.
Lastly, add your SSH key to your droplet so that you can access your server using SSH, and NOT by typing in your password every time.
Click the "add new" tab under the Add SSH Key heading. Grab your public key by running cat ~/.ssh/id_rsa.pub in your terminal and pasting it into the form field.
Click "Create" and you'll be taken to the dashboard to view your new droplet!
Now we're ready to set up our server.
Setting Up Your Server
Before we do anything else, we need to configure our server. We'll be setting up an additional user through which we'll be interacting with our server. This is a safer approach because we'll be effectively sandboxing our user and allowing them to interact with (i.e. install things into, set-up and change the environment of) a smaller portion of our server.
For this portion of my journey to deployment, I found this article to be particularly helpful and the steps outlined below are largely cribbed from it.
Step 1: Login as Root with SSH
In your terminal, ssh into your server as the root user:
# your machine
$ ssh root@SERVER_IP_ADDRESS
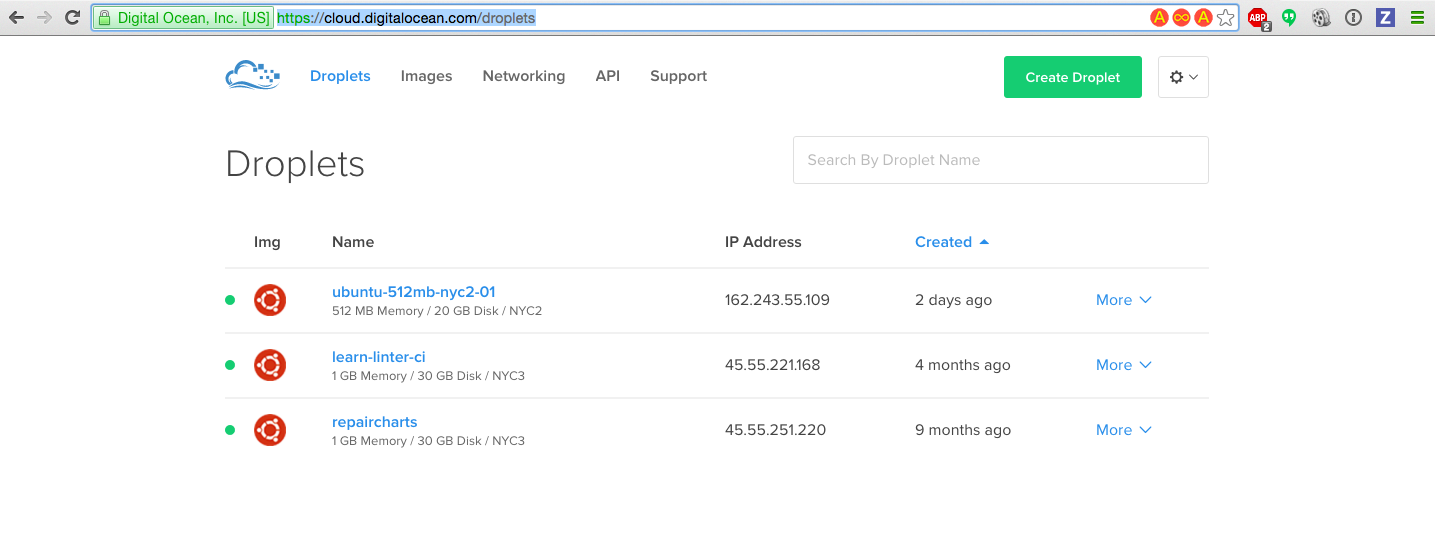
You can find your server IP address by visiting https://cloud.digitalocean.com/droplets:
If this is the first time you're connecting to your server, you'll see the following:
The authenticity of host '123.123.123.123 (123.123.123.123)' can't be established.
ECDSA key fingerprint is
79:95:46:1a:ab:37:11:8e:86:54:36:38:bb:3c:fa:c0.
Are you sure you want to continue connecting (yes/no)?
Your computer is telling you that the server to which you are connecting is not recognized. Type yes and hit enter!
And we're in! If you need help troubleshooting any of these steps, check out this article
What is the Root User?
The root user is the administrative user in a Linux environment that has very broad privileges. Because of the heightened privileges of the root account, you are actually discouraged from using it on a regular basis. This is because part of the power inherent with the root account is the ability to make very destructive changes, even by accident.*
For this reason, we'll be setting up another user with a reduced scope of influence. This is the user we'll be logging in as when we move forward with deploying our app.
Step 2: Create The Alternative User
Okay, let's create that user. Make sure you are logged in as the root user and run the following:
# in your ubuntu installation on your droplet
> adduser rails
We'll call our user "rails" because we'll be deploying a Rails app. You can call your user whatever you want, btw.
You'll be prompted to add a password. Pick a strong password, enter it and hit "enter". You can skip filling in the additional info you're prompted to enter.
We've just created a new account with normal, i.e. not admin, or root, privileges. However, we will want our user to be able to run certain administrative commands. So, we'll give our normal user "super user" privileges. This will allow us to run administrative commands, preceded by sudo.
On Ubuntu, users in the "sudo" group are allowed to use the sudo command. Let's add our "rails" user to that group. Still logged in as the root user, run:
> gpasswd -a rails sudo
Now we're ready for the next step.
Step 3: Add SSH to the new user
Let's set up SSH authentication for our new user. This way, can log in to this user securely using our SSH public key, rather than entering a password every time.
Open another window in your terminal so that you are interacting with your local machine, not the DigitalOcean server to which you are connected as the root user. Then run:
# your computer
$ cat ~/.ssh/id_rsa.pub
Copy the public key that is outputted to the terminal. Now, switch back to the terminal window in which you are connected to your DO droplet and execute the following command:
# digitalocean
> su - rails
Then, create a new directory and set its permissions:
# digitalocean as 'rails' user
> mkdir .ssh
> chmod 700 .ssh
The 700 permission code means the owner of the file can read, write and execute.
Then, create a file in .ssh and open it in the text editor:
# digitalocean as 'rails' user
> nano .ssh/authorized_keys
Paste your public key here and then save and exit the file with CTRL-X, then Y, the ENTER.
Lastly, set the permissions of the authorized_keys file to read and write with:
# digitalocean as 'rails' user
> chmod 600 .ssh/authorized_keys
Now, run the following command, just once, to return to the root user:
# digitalocean as 'rails' user
> exit
Now that we've returned to operating at the root user, let's configure out server to disallow future SSH log-ins as root. This is more secure––we'll only allow ourselves to interact with our server as the sudo user, which we've called "rails". This user is somewhat cordoned off, or sandboxed, within our server. We're therefore interacting with our server more securely, because we're interacting with it via a user that does not have root privileges and therefore cannot execute certain destructive commands. In the future, should we need to exercise some of those privileges, we can scale up the permissions of our "rails" user.
Step 4: Configure SSH For the Root User
As the root user, execute the following to open your ssh configuration file in your text editor:
# digitalocean
> nano /etc/ssh/sshd_config
In this file, find the following line:
# /etc/ssh/sshd_config

PermitRootLogin yes
And change the yes, to no. Save and exit with CTRL + X, then Y, then ENTER.
Now, restart your SSH daemon with:
# digitalocean
> service ssh restart
And that's it!
But, before you log out of the root user, let's confirm that we've configured everything correctly.
Open up another terminal window and try SSH-ing into your server as the rails user:
# local
$ ssh rails#SERVER_IP_ADDRESS
You'll be prompted to enter the password you set for this user, but when we log in in the future, we'll be able to skip this step. Now that we're successfully logged in as the rails user, go back to the window in which you are logged in as root and type exit.
Now that our rails user is all set up, we're ready to get our environment ready to run a Rails app. Note that for the remainder of this tutorial, you should be logged in to your server as the "rails" user.
Setting Up Our Environment For Rails
We'll be using rbenv to install and manage our Ruby versions. This section of the tutorial is mainly drawn from this article.
rbenv is lighter weight and more flexible for RVM, and thus a better fit for our remote server in which we won't be doing a lot of development, just deploying applications we've developed on our local machine.
Why is rbenv lighter than RVM? Well, it doesn't install Ruby (we get to do that manually, and to our own specifications) and it doesn't manage gemsets (we'll use Bundler for that). It also doesn't have a configuration file.
rbenv has one job: manage Ruby installations and switch between them. It does so by creating shim files in ~./rbenv/shims which retrieve the correct version of Ruby, as specified by your application. ~./rbenv/shims get added to your PATH, meaning there is no need for rbenv to be loaded into your shell (unlike RVM). To learn more about rbenv and how it compares to RVM, check out the rbenv documentation and this excellent article.
Now that we're all convinced that rbenv is the right tool for the job, let's use it!
Step 1: Installing rbenv
First, we need update apt-get. For those of you who are used to working wit OS X, apt-get is the package management command line program that works with Ubuntu's APT (Advanced Packaging Tool) library.
Make sure you are logged in to your DigitalOcean droplet as the rails user and run:
# digitalocean
> sudo apt-get update
Now, install the rbenv and Ruby dependencies, including openssl and sqlite3.
> sudo apt-get install git-core curl zlib1g-dev build-essential libssl-dev libreadline-dev libyaml-dev libsqlite3-dev sqlite3 libxml2-dev libxslt1-dev libcurl4-openssl-dev python-software-properties libffi-dev
Now, install rbenv with the following commands:
> cd
> git clone git://github.com/sstephenson/rbenv.git .rbenv
> echo 'export PATH="$HOME/.rbenv/bin:$PATH"' >> ~/.bash_profile
> echo 'eval "$(rbenv init -)"' >> ~/.bash_profile
> git clone git://github.com/sstephenson/ruby-build.git ~/.rbenv/plugins/ruby-build
> echo 'export PATH="$HOME/.rbenv/plugins/ruby-build/bin:$PATH"' >> ~/.bash_profile
> source ~/.bash_profile
This will do two things for us: install rbenv into the home directory and set the environment variables that will allow rbenv to deliver the right version of Ruby.
Step 2: Installing Ruby
Install Ruby with the following:
> rbenv install -v 2.3.0
> rbenv global 2.3.0
This first installs Ruby and then sets the global version of Ruby, or the version that will be used in all of our shells.
Make sure that everything was installed properly with:
> ruby -v
Let's configure it so that Rubygems will not install documentation locally for every gem that we install:
> echo "gem: --no-document" > ~/.gemrc
Lastly, we'll install bundler:
> gem install bundler
Now we're ready to install Rails!
Step 3: Installing Rails
This part is easy:
> gem install rails
Then, run
> rbenv rehash
Any time we install a gem that includes binaries, or executable scripts, you need to run rbenv rehash so that rbenv can create the necessary shim files.
When we install a gem, provided that gem has executables, binstub files will get generated. Binstubs are wrappers around executables that prepare the environment before calling on the original executable. The shims directory that rbenv adds to $PATH contains binstubs for every executable related to Ruby.
To learn more, check out this section of the rbenv documentation.
We're almost done setting up Ruby and Rails!
Step 6: Installing Javascript Runtime
Recall that the asset pipeline depends on Javascript runtime. So, we'll need to install Node.js.
First, add the Node PPA (Personal Package Archives) to apt-get
> sudo add-apt-repository ppa:chris-lea/node.js
Then, update apt-get and install Node
> sudo apt-get update
> sudo apt-get install nodejs
Last but not least, we need to configure Git.
Step 7: Configure Git
We need to do two things before we are ready to clone down our app and get it up and running on our server in production mode.
Git embeds our username and password in our commits, so let's set up our username and password for GitHub, here on our server.
> git config --global user.name "Your Name"
> git config --global user.email "youremail@domain.com"
Now, let's set up SSH with GitHub. First, we'll need to generate a public key for our "rails" user account on our server.
Logged in as "rails" user, run
> ssh-keygen
This will output:
Generating public/private rsa key pair.
Enter file in which to save the key (/home/rails/.ssh/id_rsa):
Hit ENTER to confirm the name of the file to which the SSH key will be written. You'll then be prompted for a passphrase. You can leave this blank and hit ENTER, twice.
Copy your public key via cat /home/rails/.ssh.id_rsa.pub. Then, go to GitHub, open your settings and add this new SSH key.
Okay, now we're ready to install PostgreSQL onto our server.
Installing PostgreSQL
For this portion, I worked primarily with this article.
First, update apt-get
> apt-get update
Then, run the following:
> sudo apt-get install libpq-dev
> sudo apt-get install postgresql-9.4 postgresql-contrib
Later, after we clone down our app and bundle install, we'll log into our Postgres server to create a new user and database and matches up to the user and database specified in the config/database.yml file in our Rails app. For now, we're ready to move on to installing Passenger and Nginx.
Part II: Install and Configure Phusion Passenger and Ngnix
This section of the tutorial owes thanks to this excellent article.
For this deployment, we'll be using Phusion Passenger as our web server. Passenger is better at handling a higher volume of traffic than other popular web servers, like Unicorn or Puma. And, as you may have realized, our cat cataloguing website is extremely important and likely to receive lots of traffic.
Installing Passenger and Nginx
First, we need to install a PGP key
> sudo apt-key adv --keyserver keyserver.ubuntu.com --recv-keys 561F9B9CAC40B2F7
Create an APT source file:
> sudo nano /etc/apt/sources.list.d/passenger.list
Add this line to the above file:
> deb https://oss-binaries.phusionpassenger.com/apt/passenger trusty main
Save and exit with CTRL + X, then Y, then ENTER.
Update the owner and permissions of the file;
> sudo chown root: /etc/apt/sources.list.d/passenger.list
> sudo chmod 600 /etc/apt/sources.list.d/passenger.list
Update apt-get:
> sudo apt-get update
Lastly, install Passenger with Ngnix
sudo apt-get install nginx-extras passenger
This last bit may overwrite the Ruby version to an older one. If so, you need to remove the incorrect Ruby location and create a new symlink to the correct Ruby binary file:
> sudo rm /usr/bin/ruby
> sudo ln -s /usr/local/bin/ruby /usr/bin/ruby
Configuring the Web Server
Open the Nginx configuration file in your text editor:
> sudo nano /etc/nginx/nginx.conf
Find and uncomment the following lines:
# passenger_root
/usr/lib/ruby/vendor_ruby/phusion_passenger/locations.ini;
# passenger_ruby /usr/bin/ruby;
Then, update the path in the passenger_ruby line. When you're done, it should look like this:
passenger_root /usr/lib/ruby/vendor_ruby/phusion_passenger/locations.ini;
passenger_ruby /usr/local/bin/ruby;
Save and exit with CTRL + X, then Y, then ENTER.
Okay, now we're ready to upload our existing Rails app and configure it for production with Nginx.
Part III: Configuring Rails for Production
We're assuming we have a Rails app that is ready for deployment, just waiting for us and hanging out on GitHub.
Step 1: Clone Your App
Since we configured git correctly earlier on in this tutorial (you may not remember, because this process is taking forever), we should be able to clone down our app int our DigitalOcean server:
git clone git@github.com:SophieDeBenedetto/do-testing.git
Once the app is cloned in, run bundle install.
Debugging Bundle Install If you get errors regarding missing gems when you run this command, execute the following:
> bundle pack
> bundle install --path vendor/cache
Step 2: Set Your Production Secrets
cd into your app:
# digitalocean
cd do-testing
Then run rake secret. You should see a generated secret key base and token generated for you:
ef16e86e0ba7f32d2550b1d750962a0aafd0e9c81a42d252becb833166b6e1b1472f74b862a2c5ccd575fe5faf5e01f47b

e113ba434a83b85b3b35c169f129f2
Then, open up the config/secrets.yml file with your text editor:
nano config/secrets.yml
and set your secret key base and token like this:
production:
  secret_key_base: ef16e86e0ba7f32d2550b1d750962a0aafd0e9c81a42d252becb833166 b6e1b1472f74b862a2c5ccd575fe5faf5e01f47b
  secret_token: e113ba434a83b85b3b35c169f129f2
Step 3: Configure the Database for Production
Add the following section to your config/database.yml file (via nano config/database.yml):
production:
  adapter: postgresql
  url: <%= ENV["DATABASE_URL"] %>
  username: digitaloceantesting
  password: <your password>
  host: localhost
  database: digitaloceantesting
Save and exit.
Now, we need to create the database with the user and password specified above. Connect to Postgres by typing
> psql
If you get an error similar to the following:
sudo: unknown user: psql
Create the user:
sudo -u postgres psql
Then, you should be connected to Postgres. Your bash prompt should now look like this:
postgres=#
Create the database, user and password to match what you specified in the database.yml file:
postgres=# create user digitaloceantesting with password '<your password>';
postgres=# create database digitaloceantesting owner digitaloceantesting;
Then, exit Postgres with
postgres=# \q
Step 4: All the Rakes
Run:
> RAILS_ENV=production rake db:migrate
> RAILS_ENV=production rake db:seed
> RAILS_EVN=production rake assets:precompile
Step 5: Configure Ngnix for your App
First, disable the default Nginx configuration.
> sudo nano /etc/nginx/sites-available/default
Comment out the following two lines:
listen 80 default_server;
listen [::]:80 default_server ipv6only=on;
Save and exit.
Now we need to create a custom Nginx configuration file for our app:
> sudo nano /etc/nginx/sites-available/do-testing
To this file, we need to add a server block that:
- enables listening on port 80
- sets the domain name (in this case the IP address of our droplet)
- enables Passenger
- sets the root to the directory of our app.
server {
  listen 80 default_server;
  server_name <IP ADDRESS of your droplet>;
  passenger_enabled on;
  passenger_app_env production;
  root /home/rails/do-testing/public;
}
Save and exit with CTRL + X, Y, ENTER.
Create a symlink for it:
> sudo ln -s /etc/nginx/sites-available/do-testing /etc/nginx/sites-enabled/do-testing
Part IV: Deploy!
We're almost done for real!
Lastly, restart Nginx:
> sudo nginx -s reload
Guess what? We're done!!
Visit: http://your-ip-address
and see your glorious app.