Google offers robust support for their APIs, including the Google Calendar API, and the Google API Ruby Client gem offers a comprehensive wrapper for this API, among others.
Integrating these tools into a Rails 5 app still proved to be something of a challenge, involving some guess work and some heavy leaning on the Google Calendar API documentation. So, I thought I'd share my approach for any similarly struggling folks out there.
Overview
This post describes a Rails 5 app that uses Devise OmniAuth with Google to authenticate users and post events to their google calendar. A couple of challenges I faced in getting this feature up and running:
- Retrieving an authenticated user's refresh token, which is necessary in order to re-authenticate a user before posting to their calendar (Google's access tokens expire relatively quickly and a user usually needs to be re-authenticated before posting to the calendar).
- Retrieving the calendar ID of the calendar to which a user wants to post events, when that user has more than one calendar associated with their account.
- Requesting information about existing events from a user's calendar, so as not to double-book events.
Now that we're familiar with the challenges at hand, let's get started!
Part I: Authenticating Users with Devise and Google OmniAuth
##### Step 1: Add the GemsThe first pain point I encountered was getting Devise to work with Rails 5. I learned that, if you're using Rails 5, you need to use the following version of the Devise gem.
# Gemfile
gem 'devise', github: 'twalpole/devise', branch: 'rails5'
To use Devise with Google OmniAuth, add the following to your Gemfile and bundle install:
# Gemfile
gem 'devise', github: 'twalpole/devise', branch: 'rails5'
gem 'omniauth-google-oauth2'
Step 2: Configure Devise
Gotcha Alert: Normally, when setting up Devise with our Rails app, we can run rails generate devise:install after we bundle install.
However, I couldn't get this to work––Rails threw various errors and eventually I hacked around it by manually creating a config/initializers/devise.rb file and copying over the content of that file from another project.
Once I did that, I was able to run rails generate devise:install, followed by rails generate devise user. Make sure you already have a users table and model. Devise will generate a migration to add Devise attributes to the users table and append Devise attributes to your existing User model.
Step 3: Configure Google OmniAuth
Generate another migration to add access_token and refresh_token to your users table. These attributes are necessary for us to communicate with the Google Calendar API and we will retrieve them from the payload sent back to our app, from Google, when Rails sends an authentication request to Google.
Next, we need to get our Client ID and Secret from Google.
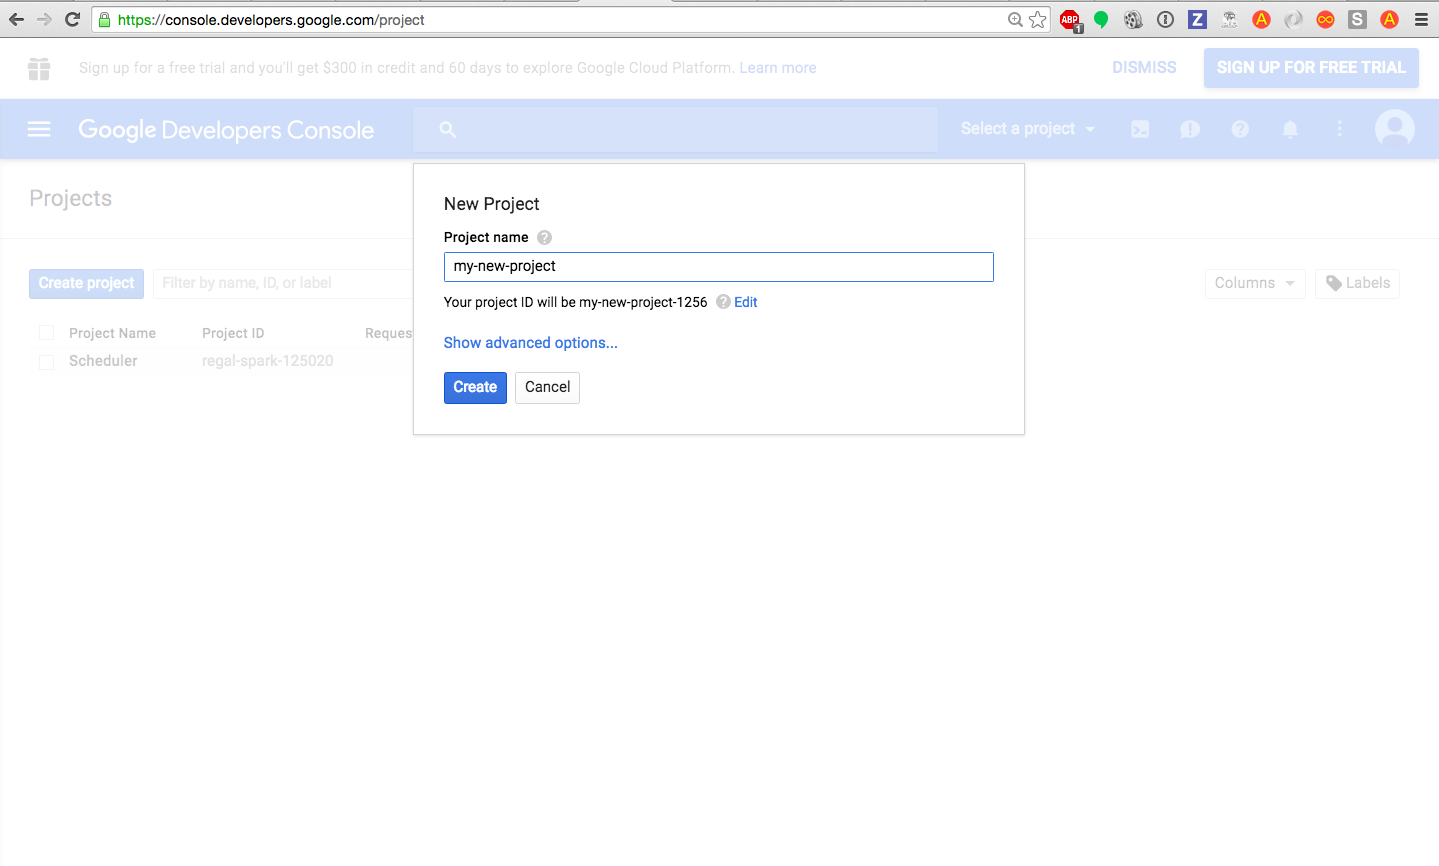
Register your App with Google
Head over to the Google Developer Console to register your app and get your Google client ID and secret.
Once your new app is created in the Developer Console, visit the API Manager tab and click "Credentials". In the Credentials screen, click "Create Credentials" and select "OAuth client id".
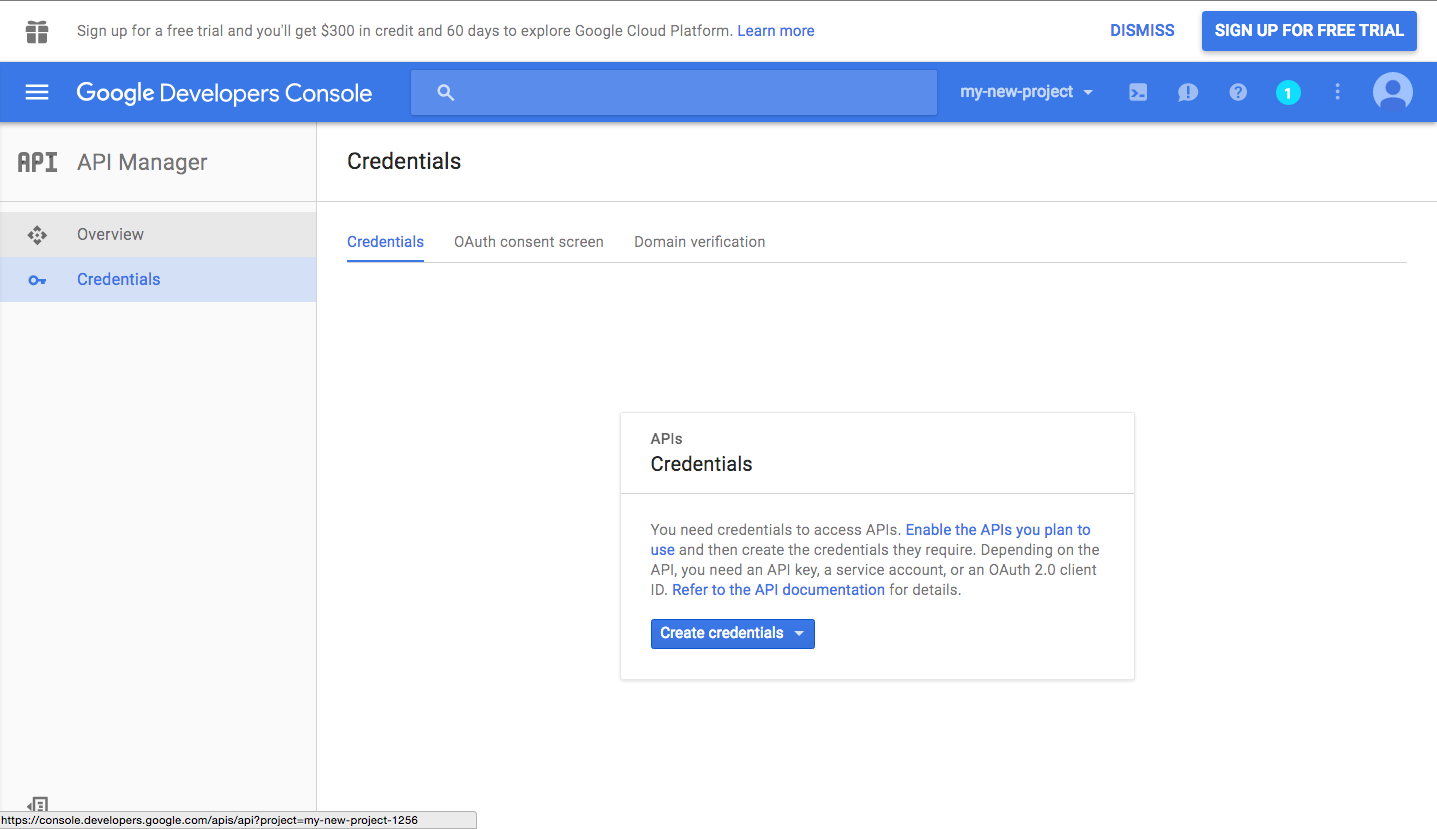
You'll be prompted to configure your consent screen and define a callback URL. Since we're using Devise, we'll set our callback URL to localhost:3000/users/auth/google_oauth2
This should be all you need to get your client ID and client secret.
Set the following environment variables: GOOGLE_CLIENT_ID and GOOGLE_CLIENT_SECRET equal to your ID and secret. Personally, I prefer Figaro for setting and hiding environment variables, but you may be using Dotenv.
Now we can finish configuring Devise.
Configure Your Devise Initializer
In config/initializers/devise.rb, add the following:
config.omniauth :google_oauth2, ENV['GOOGLE_CLIENT_ID'],
  ENV['GOOGLE_CLIENT_SECRET'],
  { access_type: "offline",
    prompt: "consent",
    select_account: true,
    scope: 'userinfo.email,calendar' }
There are a couple of important things to note here:
- In order for Google to send us back not only an access token, but a refresh token, we need to specify a few options:
prompt: "consent"access_type: "offline"
- Secondly, we need to include
calendarin thescope, so that we can interact with the Google Calendar API later on.
We're almost done with Part I. Next up, we need to write our custom callback controller method and our custom user authentication method.
Step 4: Custom Callback Controller and User Authorization Method
When we ran rails generate devise:install, the following was appended to our routes.rb file:
Rails.application.routes.draw do
  devise_for :users
end
We'll customizing the Devise Callbacks Controller with our own find_for_google_oauth2 method.
First, specify which controller Devise should use as the Callbacks Controller in your Routes file:
Rails.application.routes.draw do
  devise_for :users, :controllers => { :omniauth_callbacks => "callbacks" }
end
Next, define the your Callbacks Controller to inherit from the Devise::OmniauthCallbacksController.
class CallbacksController < Devise::OmniauthCallbacksController
  def google_oauth2
    @user = User.find_for_google_oauth2(request.env["omniauth.auth"])
    if @user
      sign_in @user
      redirect_to root_path
    else
      redirect_to new_user_session_path, notice: 'Access Denied.'
    end
  end
end
Lastly, we'll define the find_for_google_oauth2 method on our User model.
class User < ApplicationRecord
  devise :database_authenticatable, :registerable,
         :recoverable, :rememberable, :trackable, :validatable, :omniauthable

  def self.find_for_google_oauth2(auth)
    data = auth.info
    if validate_email(auth)
      user = User.where(provider: auth.provider, uid: auth.uid).first_or_create do |user|
        user.provider = auth.provider
        user.uid = auth.uid
        user.email = auth.info.email
        user.password = Devise.friendly_token[0,20]
      end
      user.token = auth.credentials.token
      user.refresh_token = auth.credentials.refresh_token
      user.save
      return user
    else
      return nil
    end
  end
Something to note about the find_for_google_oauth2 method: make sure that you are re-assigning and persisting the token and refresh token sent from Google each time you authorize the user. We need to retrieve these new tokens every time we authenticate a user.
We're (actually) almost done with Part I!
Lastly, add the "Sign In with Google" Link to your view:
# app/views/application.html.erb

<%= link_to "Sign In with Google", user_omniauth_authorize_path(:google_oauth2)%>
Alright, we're ready to move on to Part II.
Part II: Using The Google API Ruby Client with The Google Calendar API
First, a little background. In this app, we have a Schedule resource (table, model, controller). Schedules have many activities and an activity has a start time and an end time. A schedule also has a specific calendar to which it needs to POST events, given that a user can have many Google calendars associated with their account. The schedule has the Google calendar id of the calendar to which it needs to post.
Let's pick it up with building our own GoogleCalendarWrapper class to communicate with the Google Calendar API.
First things first, add the Google API Ruby Client gem to your Gemfile and bundle install:
gem 'google-api-client', '0.8.2', require: 'google/api_client'
Gotcha Alert: I couldn't get this working in Rails 5 with the most recent version of the API Client gem. After digging around GitHub issues for a little while, I followed a tip to switch to version 0.8.2, and this got it working for me.
Okay, back to our wrapper. We'll be using our GoogleCalendarWrapper in the Schedules Controller. Something like this:
# app/controllers/schedules/controller.rb
...
def make_google_calendar_reservations
  @schedule = @cohort.schedules.find_by(slug:
    params[:slug])
  @calendar = GoogleCalWrapper.new(current_user)
  @calendar.book_rooms(@schedule)
end
Our GoogleCalendarWrapper class needs to initialize the Google API Ruby client and initialize the Google Calendar API service. Only then can it post events to the user's Google calendar.
Initializing the Client
Let's start by initializing the client and calendar service:
class GoogleCalendarWrapper

  def initialize(current_user)
    configure_client(current_user)
  end

  def configure_client(current_user)
    @client = Google::APIClient.new
    @client.authorization.access_token = current_user.token
    @client.authorization.refresh_token = current_user.refresh_token
    @client.authorization.client_id = ENV['GOOGLE_CLIENT_ID']
    @client.authorization.client_secret = ENV['GOOGLE_CLIENT_SECRET']
    @client.authorization.refresh!
    @service = @client.discovered_api('calendar', 'v3')
  end
end
Here, we use the access token and refresh token that we persisted to our user when the user was first authorized with Google OmniAuth, together with the client ID and secret Google assigned us when we registered our app.
Gotcha Alert: Take note of one line in particular:
@client.authorization.refresh!
We need to refresh our user's access token and refresh token in order to effectively re-authorize our user before interacting with the Google Calendar API. This is because our original access token and refresh token may have expired by this time.
Okay, we're just about ready to build out our book_events method. But first, we need to get the ID of the user's calendar.
Getting the User's Calendar ID
Another obstacle I faced in getting this feature working was retrieving the calendar ID of the appropriate calendar. A user can have many Google calendars, but we need to POST events to a specific one of the user's calendars––the calendar associated to the specific schedule we are dealing with.
So, how do we access a list of the user's calendars in order to identify the right one?
With the following code:
# GoogleCalendarWrapper
response = @client.execute(api_method: @service.calendar_list.list)
This API call will return the following payload:
calendars = JSON.parse(response.body)

# => {"kind"=>"calendar#calendarList",
 "etag"=>"\"1458339303628000\"",
 "nextSyncToken"=>"COCXXXXXXXhdGlyb25zY2hvb2wuY29t",
 "items"=>
  [{"kind"=>"calendar#calendarListEntry",
    "etag"=>"\"145XX6847112000\"",
    "id"=>    "s@gmail.com36@resource.calendar.google.com",
    "summary"=>"Conference Room - 1",
    "timeZone"=>"America/New_York",
    "colorId"=>"16",
    "backgroundColor"=>"#4986e7",
    "foregroundColor"=>"#000000",
    "selected"=>true,
    "accessRole"=>"reader",
    "defaultReminders"=>[]},
   {"kind"=>"calendar#calendarListEntry",
    "etag"=>"\"1458068365807000\"",
    "id"=>
     "my_company.com_313938@resource.calendar.google.com",
    "summary"=>"Conference Room - 2",
    "timeZone"=>"America/Los_Angeles",
    "colorId"=>"13",
    "backgroundColor"=>"#92e1c0",
    "foregroundColor"=>"#000000",
    "selected"=>true,
    "accessRole"=>"reader",
    "defaultReminders"=>[]},
   {"kind"=>"calendar#calendarListEntry",
    "etag"=>"\"1458071051048000\"",
    "id"=>"sophie@gmail.com",
    "summary"=>"sophie@gmail.com",
    "timeZone"=>"America/New_York",
    "colorId"=>"14",
    "backgroundColor"=>"#9fe1e7",
    "foregroundColor"=>"#000000",
    "selected"=>true,
    "accessRole"=>"owner",
    "defaultReminders"=>[{"method"=>"popup", "minutes"=>10}],
  "notificationSettings"=>
     {"notifications"=>
       [{"type"=>"eventCreation", "method"=>"email"},
        {"type"=>"eventChange", "method"=>"email"},
        {"type"=>"eventCancellation", "method"=>"email"},
        {"type"=>"eventResponse", "method"=>"email"}]},
    "primary"=>true}
}
Our individual calendar hashes can be found in calendars["items"]. Now, we can parse this collection of calendars for the id of the calendar associated with our schedule:
#GoogleCalendarWrapper
...
def calendar_id(schedule)
  response = @client.execute(api_method:
    @service.calendar_list.list)
  calendars = JSON.parse(response.body)
  calendar = calendars["items"].select {|cal|
    cal["id"].downcase == schedule.calendar_id}
  calendar["id"]
end
Now that we have the calendar ID we need, we're almost ready to book calendar events. First, we need to check for calendar availability. To do this, we need to use the freebusy query methods made available to us by the Google Calendar API.
Querying Calendar Availability
@client.execute(api_method: @service.freebusy.query,
  body: JSON.dump({timeMin: start_time,
  timeMax: end_time,
  timeZone: "EST",
  items: [calendar_id]}),
  headers: {'Content-Type' => 'application/json'})
The freebusy query methods must be accompanied by a request body that specifies the following:
- The start time and end time of the period for which we want to query events.
items, which should be set equal to an array of calendar ids (i.e. the ids of the calendar whose availability we want to query).headers, which should set the content type toapplication/json.
Gotcha Alert: It took me a while to get the start_time and end_time just right. First of all, the DateTime needs to be formatted exactly right. Like this:
2016-03-20T11:04:00+0000
Secondly, I found I had to cast a wide net to return accurate information regarding a calendars existing events. Only if I set the start and end times to frame a 24-hour period would I see a list of existing events returned to me.
Okay, so, if we JSON.parse the response of the above query, we get a collection of hashes, each of which represents a pre-existing calendar event. We can therefore compare the start and end times of the existing events with the start and end times of the event we want to book, in order to avoid double booking.
Now we're ready to book those events!
Inserting New Events to the Calendar
Okay, we're in the home stretch. Let's assume we've checked a new event's start and end time against the start and end times of existing events and determined that the calendar is free. Let's book that new event!
The code we use to POST new events to a user's calendar looks like this:
@client.execute(:api_method => @service.events.insert,
  :parameters => {'calendarId' => calendar_id,
    'sendNotifications' => true},
  :body => JSON.dump(event),
  :headers => {'Content-Type' => 'application/json'})
The event object that we are POST-ing to the user's calendar should be structured like this:
event = {
  summary: "Board of Directors Meeting",
  location: "Conference Room - 1",
  start: {dateTime: 2016-03-20T11:04:00+0000},
  end: {dateTime: 2016-03-20T12:04:00+0000},
  description: "important meeting with the board",
}
And that's it! Before you go, check out the brief summary of Google API Ruby Client + Google Calendar API methods below.
Google Calendar API Method Summary
Configure the Client
@client = Google::APIClient.new
@client.authorization.access_token = current_user.token
@client.authorization.refresh_token = current_user.refresh_token
@client.authorization.client_id = ENV['GOOGLE_CLIENT_ID']
@client.authorization.client_secret = ENV['GOOGLE_CLIENT_SECRET']
@client.authorization.refresh!
Configure Google Calendar Service
@service = @client.discovered_api('calendar', 'v3')
Get User's Calendars
@client.execute(api_method:
  @service.calendar_list.list)
  calendars = JSON.parse(response.body)
Get Calendar Events
@client.execute(api_method: @service.freebusy.query,
  body: JSON.dump({timeMin: start_time,
  timeMax: end_time,
  timeZone: "EST",
  items: [calendar_id]}),
  headers: {'Content-Type' => 'application/json'})
Insert Calendar Event
event = {
  summary: "Board of Directors Meeting",
  location: "Conference Room - 1",
  start: {dateTime: 2016-03-20T11:04:00+0000},
  end: {dateTime: 2016-03-20T12:04:00+0000},
  description: "important meeting with the board",
}

@client.execute(:api_method => @service.events.insert,
  :parameters => {'calendarId' => calendar_id,
    'sendNotifications' => true},
  :body => JSON.dump(event),
  :headers => {'Content-Type' => 'application/json'})