So, grapes are a food. Grape is a gem that can help us build REST-ful APIs in a Rails framework. This post is about Grape, the gem, not grapes, the food.
Now that we have that cleared up, let's begin.
What is Grape?
According to Grape, Grape is a...
REST-like API micro-framework built to complement existing web application frameworks by providing a simple DSL to easily provide APIs. It has built-in support for common conventions such as multiple formats, subdomain/prefix restriction, and versioning.
Installing the grape gem in a rails application allows us to use Grape's DSL to easily construct an API out of our Rails backend. Thereafter, any web client can, via HTTP requests, access or (if we so choose) edit the data in our database.
Set Up
For this example, we'll be making an API out of a simple Rails application that stores a directory of people in a Postgresql database. I have aspirations of turning this app into a directory of Flatiron School grads, so, although we are using only test data for the time being, our fake contacts are stored in a Graduates table which corresponds to a Graduate model.
First, add gem 'grape' to your Gemfile and bundle install.
Now, we'll set up our API file structure:
In the controllers subdirectory of your app, create an api folder:
app
 |––controllers
       |––api
This is where we'll build the framework for our API. Alternatively, you can make an api directory in the top level of your app. If you do so, remember to add that directory to your Rails load path in config/application.rb.
Building the API
Grape APIs are Rack applications that are created by subclassing you API modules or classes under Grape::API.
Creating the API Module and Base Class
We'll start by defining our API module and our base or root class that will inherit from Grape::API.
Create a file, base.rb in your api subdirectory:
app
 |––controllers
       |––api
           |––base.rb
In this file, we'll accomplish the above goals:
module API
  class Base < Grape::API
    mount API::V1::Base
  end
end
We set up our API module, define our Base class (which inherits from Grape::API) and mount some other stuff within that class. Before we talk about what we're mounting, let's learn what the mount keyword does.
The mount keyword in rails
The mount keyword tells your Rails app that another application (usually a rack application and this case our Grape API) exists at that location. Mounting a rack app here means that the functionality of that app/code base is now available inside our Rails application.
Versioning
The Grape framework supports versioning. This means that we will nest our API inside of a version one or v1 module. Future versions that we may develop as our application grows will then be nested inside version two, three etc. modules.
Nesting Our Modules
Create a subdirectory, v1, under your api subdirectory:
app
 |––controllers
       |––api
           |––base.rb
           |––v1
In the previous section, we created our Base Class in the top level of our API module. It lives in the base.rb file in the top level of our api subdirectory. That class mounts the base class that is specific to version one of our api. So, let's build the base class for version one of our API.
Create a base.rb file inside the v1 subdirectory:
app
 |––controllers
       |––api
           |––base.rb
           |––v1
               |––base.rb
This class has one responsibility––mount another class that will access our Graduate model.
Place the following code in app/controllers/api/v1/base.rb:
module API
  module V1
    class Base < Grape::API
      mount API::V1::Graduates
      # mount API::V1::AnotherResource
    end
  end
end
So, we see our Base class is nested under the V1 module which in turn is nested under the API module that we defined earlier.
We're almost done nesting! We've just mounted the Graduates class, which will access the Graduate model and our database for us. Now let's build it.
Create a graduates.rb file in the v1 directory:
app
 |––controllers
       |––api
           |––base.rb
           |––v1
               |––base.rb
               |––graduates.rb
Defining Our API Endpoints
Here's where the API magic happens. Our API is a little lazy, because this tutorial is going to be long enough as it is. Let's define our Graduates class, inside our API module, to respond to a GET request for all the grads and a GET request for an individual grad.
In app/controllers/api/v1/graduates.rb:
module API
  module V1
    class Graduates < Grape::API
      include API::V1::Defaults

      resource :graduates do
        desc "Return all graduates"
        get "", root: :graduates do
          Graduate.all
        end

        desc "Return a graduate"
        params do
          requires :id, type: String, desc: "ID of the
            graduate"
        end
        get ":id", root: "graduate" do
          Graduate.where(id: permitted_params[:id]).first!
        end
      end
    end
  end
end
The Graduates class here inside our API functions like a controller.
First, we specify the resource or model that we are trying to access with resource :graduates do
Then, we define the GET requests that will return to the client the appropriate information.
Getting All the Graduates:
This block:
desc "Return all graduates"
        get "", root: :graduates do
          Graduate.all
        end
Ensures that, when a client fires a GET request to the root path of our api, GET http://localhost:3000/api/v1/graduates, the server will deliver all of the graduates, Graduate.all.
Getting Just One Graduate:
This block:
desc "Return a graduate"
        params do
          requires :id, type: String, desc: "ID of the
            graduate"
        end
        get ":id", root: "graduate" do
          Graduate.where(id: permitted_params[:id]).first!
        end
Ensures that, when a client sends a GET request to http://localhost:3000/api/v1/graduates with the required parameters appended, the server will return the Graduate with the correct id.
Okay, almost done nesting...(I know I said that earlier but I mean it this time).
You may have noticed that this Graduates class mixes in or includes another module: include API::V1::Defaults.
The Default Mixin
There are some behaviors that it will be helpful for all of our API classes to have––across versions and across resources. This sounds like a good case for a mixin!
Create the defaults.rb file here: app/controllers/api/v1/defaults.rb.
Edit it to include the following:
module API
  module V1
    module Defaults
      extend ActiveSupport::Concern

      included do
        prefix "api"
        version "v1", using: :path
        default_format :json
        format :json
        formatter :json,
             Grape::Formatter::ActiveModelSerializers

        helpers do
          def permitted_params
            @permitted_params ||= declared(params,
               include_missing: false)
          end

          def logger
            Rails.logger
          end
        end

        rescue_from ActiveRecord::RecordNotFound do |e|
          error_response(message: e.message, status: 404)
        end

        rescue_from ActiveRecord::RecordInvalid do |e|
          error_response(message: e.message, status: 422)
        end
      end
    end
  end
end
Here, we're using ActiveSupport::Concern to add some behavior to whichever of our Grape::API classes mix this in. This benefits us by extracting common behavior into one central location.
The behavior we're defining here in the included block sets our prefix, our API's version, default formatting and the formatter that will serialize our Graduate objects into JSON. More on serialization later. We're also adding a few methods to rescue and handle errors.
Okay, we've built our API module and our Graduate endpoints. Now, we need to set up our routes, define our serializer, and create our API documentation.
Routing
In config/routes.rb add the following:
Rails.application.routes.draw do
  mount API::Base, at: "/"
end
Once again we see our friend the mount keyword. Remember, it's telling our application that another application (our API Rack app) is present.
We are matching the root path to the root of our API, which, thanks to our fabulous nesting modules, is http://localhostorwhateverhostyouwant/api/v1/graduates
But wait! The whole point of an API is that some person out there on the world wide web can send a request to the above URL and have data returned to them. How can my application share it's resources with another client? This is where the CORS, or Cross Origin Resource protocol comes in.
CORS
What is a cross-site request?
Cross-site HTTP requests are HTTP requests for resources from a different domain than the domain of the resource making the request.
- MDN
Such requests are subject to security-based restrictions. To handle this restrictions, and get around them in a secure manner, W3C developed CORS.
What is CORS?
The Cross-Origin Resource Sharing (CORS) mechanism provides a way for a server to support cross-site requests and enable the secure transfer of data across different domains/sites.
How can our API utilize CORS?
With the rack-cors gem!. This gem provides Rack CORS Middleware to our Rails app, allowing it to support cross-origin resource sharing.
Setting up Rack-CORS
A few easy steps and we'll be ready to go!
-
Add the following to your Gemfile and bundle install:
gem 'rack-cors', :require => 'rack/cors'. -
Add your API module to
config/application.rband configure your Rack-CORS Middleware:
module Api
  class Application < Rails::Application
    config.middleware.use Rack::Cors do
      allow do
        origins "*"
        resource "*", headers: :any, methods: [:get,
            :post, :put, :delete, :options]
      end
    end
    config.active_record.raise_in_transactional_callbacks = true
  end
With origins "*", we specify that our API will accept HTTP requests from any domain in the whole wide internet.
With resource "*", we specify that a cross-origin request can access any of our resources (although we currently only have one––the resource for graduates).
We then specify that a cross-origin request using any HTTP method will be accepted––although, if you recall, we defined our Graduates class inside our API module to respond to only requests for all grads or just one grad. We can add the other HTTP methods later.
Serializing
We've built a lot so far. Let's step back and walk through a client's attempt to access our API:
-
Client sends an HTTP GET request to our API via something like:
http://ourawesomedomainname/api/v1/graduates -
That request gets routed to the Graduates class that we've built into our API module, in
app/controllers/api/v1/graduates.rb. That class will respond by serving up all of the grads to the client who requested them because of this block of code:
get "", root: :graduates do
   Graduate.all
end
3 . Our serializer takes the return value of calling Graduate.all and converts it from an array of Ruby objects into valid JSON.
We're going to use a gem (surprise), to help us serialize our data.
Grape::ActiveModelSerializers
Let's get everything set up:
- Add
gem 'grape-active_model_serializers'to your Gemfile and bundle install. - Tell your API to use
Grape::Formatter::ActiveModelSerializers. Great news––we already did this! Remember ourapp/controllers/api/v1/defaults.rbfile?
module API
  module V1
    module Defaults
      extend ActiveSupport::Concern

      included do
        prefix "api"
        version "v1", using: :path
        default_format :json
        format :json
        formatter :json,
             Grape::Formatter::ActiveModelSerializers
         ...
- Write your serializer.
Writing Our Serializer
Create a directory, serializers, in the top level of your app. Create a graduate_serializer.rb file in that directory. Here is where our serializer will live.
Serializers are inferred by active_record model names. So, grape-active_model_serializers will search for serializers for the objects returned by your grape API. In other words, we are calling Graduate.all in our API, so the serializer gem will search for a serializer with the same name.
Now, let's define our serializer to serialize all of the attributes that a graduate has. In app/serializers/graduate_serializer.rb:
class GraduateSerializer < ActiveModel::Serializer

  attributes :id, :first_name, :last_name, :cohort,
       :current_job, :bio, :news, :website, :picture,
       :created_at, :updated_at
end
And that's it! One more thing before our API is ready––documentation. Guess what? There's a gem for that.
Grape Swagger
The grape-swagger gem autogenerates Swagger-compliant documentation for your Grape API.
Let's set it up! We're going to walk through the following:
- Add
gem 'grape-swagger'to your Gemfile and bundle install. - Add grape-swagger documentation to the root or base class of your API.
- Add the documentation endpoint to your routes.
Adding grape-swagger to our base class
In the version 1 base class of our API, we'll add our swagger documentation.
Go to app/controllers/api/v1/base.rb and edit it to match the following:
require "grape-swagger"

module API
  module V1
    class Base < Grape::API
      mount API::V1::Graduates
      # mount API::V1::AnotherResource

      add_swagger_documentation(
        api_version: "v1",
        hide_documentation_path: true,
        mount_path: "/api/v1/swagger_doc",
        hide_format: true
      )
    end
  end
end
Adding a documentation route
Add the following line to config/routes.rb:
mount GrapeSwaggerRails::Engine, at: "/documentation"
Now, if you visit http://localhost/documentation, you will be routed to this base url: http://localhost:3000/api/v1/swagger_doc.
Thanks to the magic of grape swagger, that page looks like this:
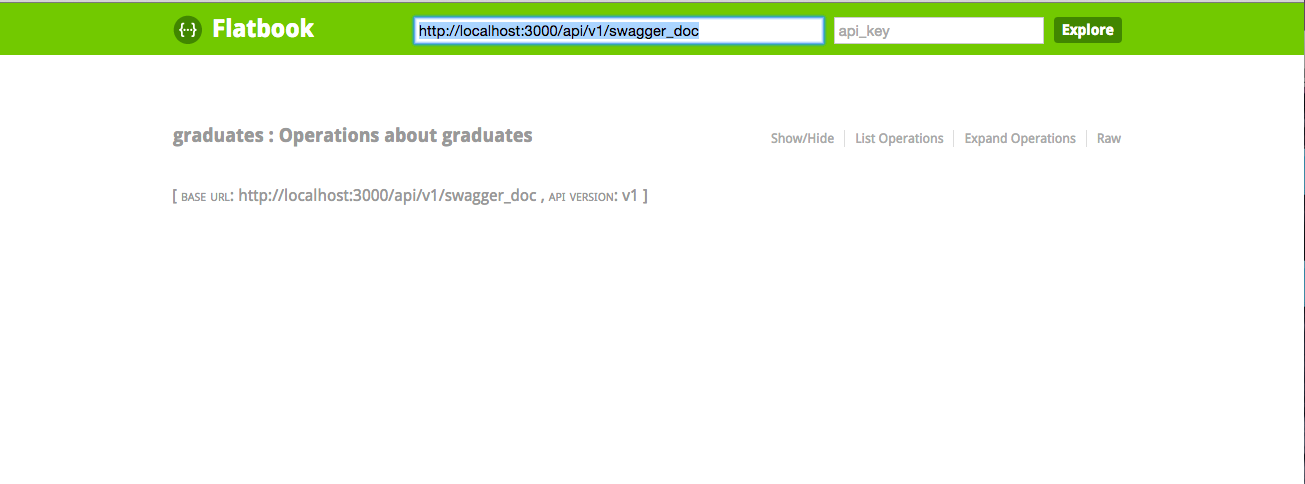
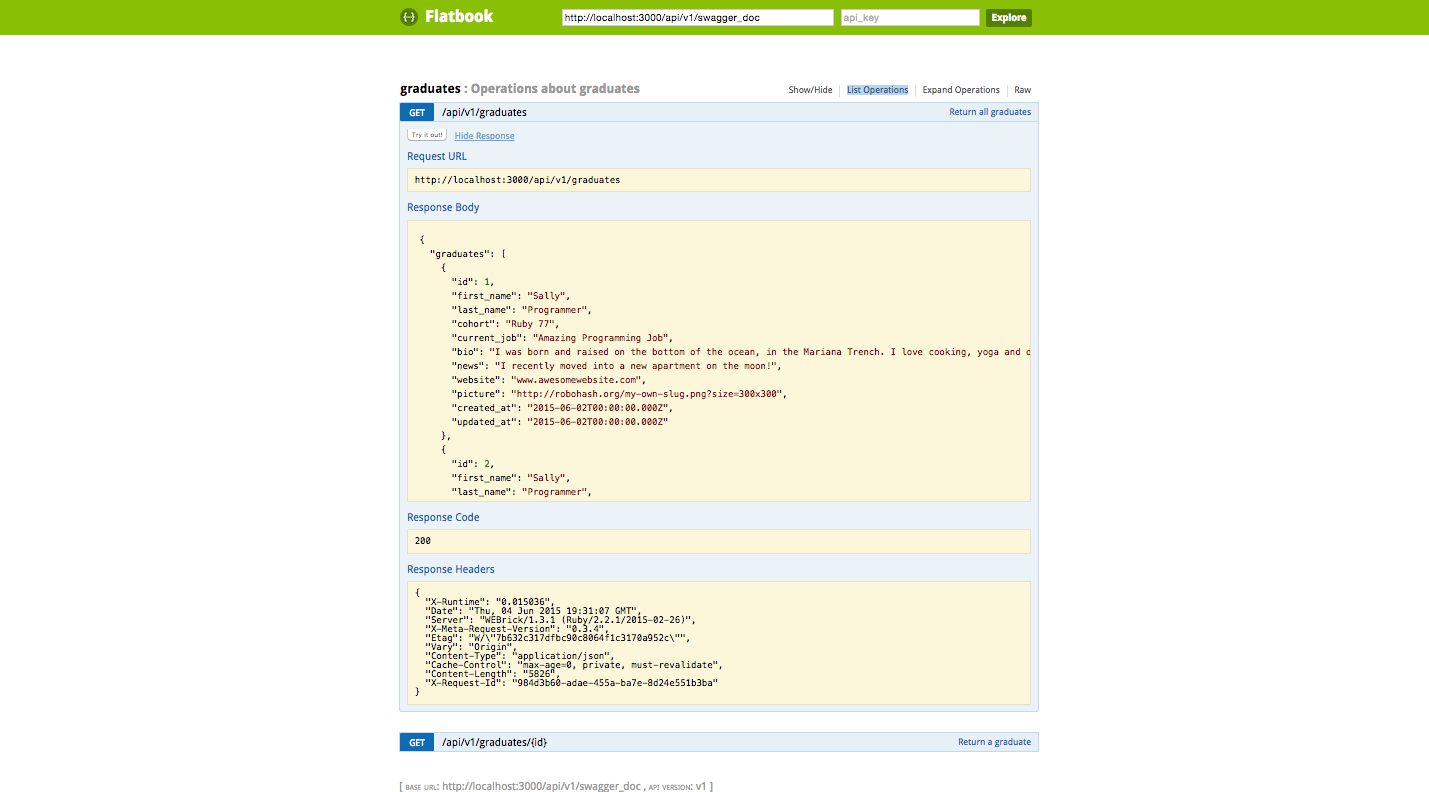
And, clicking "List Operations" in the menu on the right, you'll be able to explore the API.
If you make a request to view all the graduates, you should see a collection of JSON objects returns to you:
Review
Let's sum up before you go. We:
- Used the grape gem to build an API module that includes access to our Graduates resource.
- Mounted that API, which is a Rack Middleware, in our routes.
- Used Rack-CORS Middleware to allow for cross-origin requests to our API.
- Used the Grape active model serializer gem to serialize the data from our Graduate objects into JSON.
- Used the Grape Swagger gem to autogenerate some documentation for our API.
I hope this has been a helpful introduction to the incredible API building capabilities of Grape.