This is the second in a series of three posts that will demonstrate implementation of three common Rails design patterns: the adapter pattern; service objects; the decorator pattern
You can find the code for these posts here You can find a demo of the app, deployed to Heroku, here.
In Part I of this series, we began refactoring a simple Rails app that helps us track issues on our GitHub repositories. You can view the code, pre- and post-refactor here.
Previously, we implemented the adapter pattern, building a wrapper for our application's interactions with the GitHub and Twilio APIs. This refactor helped us begin to clean up our controllers. However, both the RepositoriesController and the WebhooksController still contain a lot of ugly logic around:
- How to create and save new
Repositoryrecords - How to update or create new
Issuerecords - How to send out email and text notifications to users.
Here, we'll build a series of services to encapsulate these responsibilities.
Let's get started!
What are Services?
A service is a Plain Old Ruby Object (PORO) that helps us keep our controllers clean and DRY.
Service objects encapsulate some of the user’s interactions with the application––the kind of stuff that doesn’t belong in the controller, but also doesn’t rightfully belong to the controller.
Think of them as the administrative assistant of your app.
Any of the above-mentioned jobs make great candidates for service objects.
Implementing Service Objects
The Repo Generator Service
Let's start with our RepositoriesController.

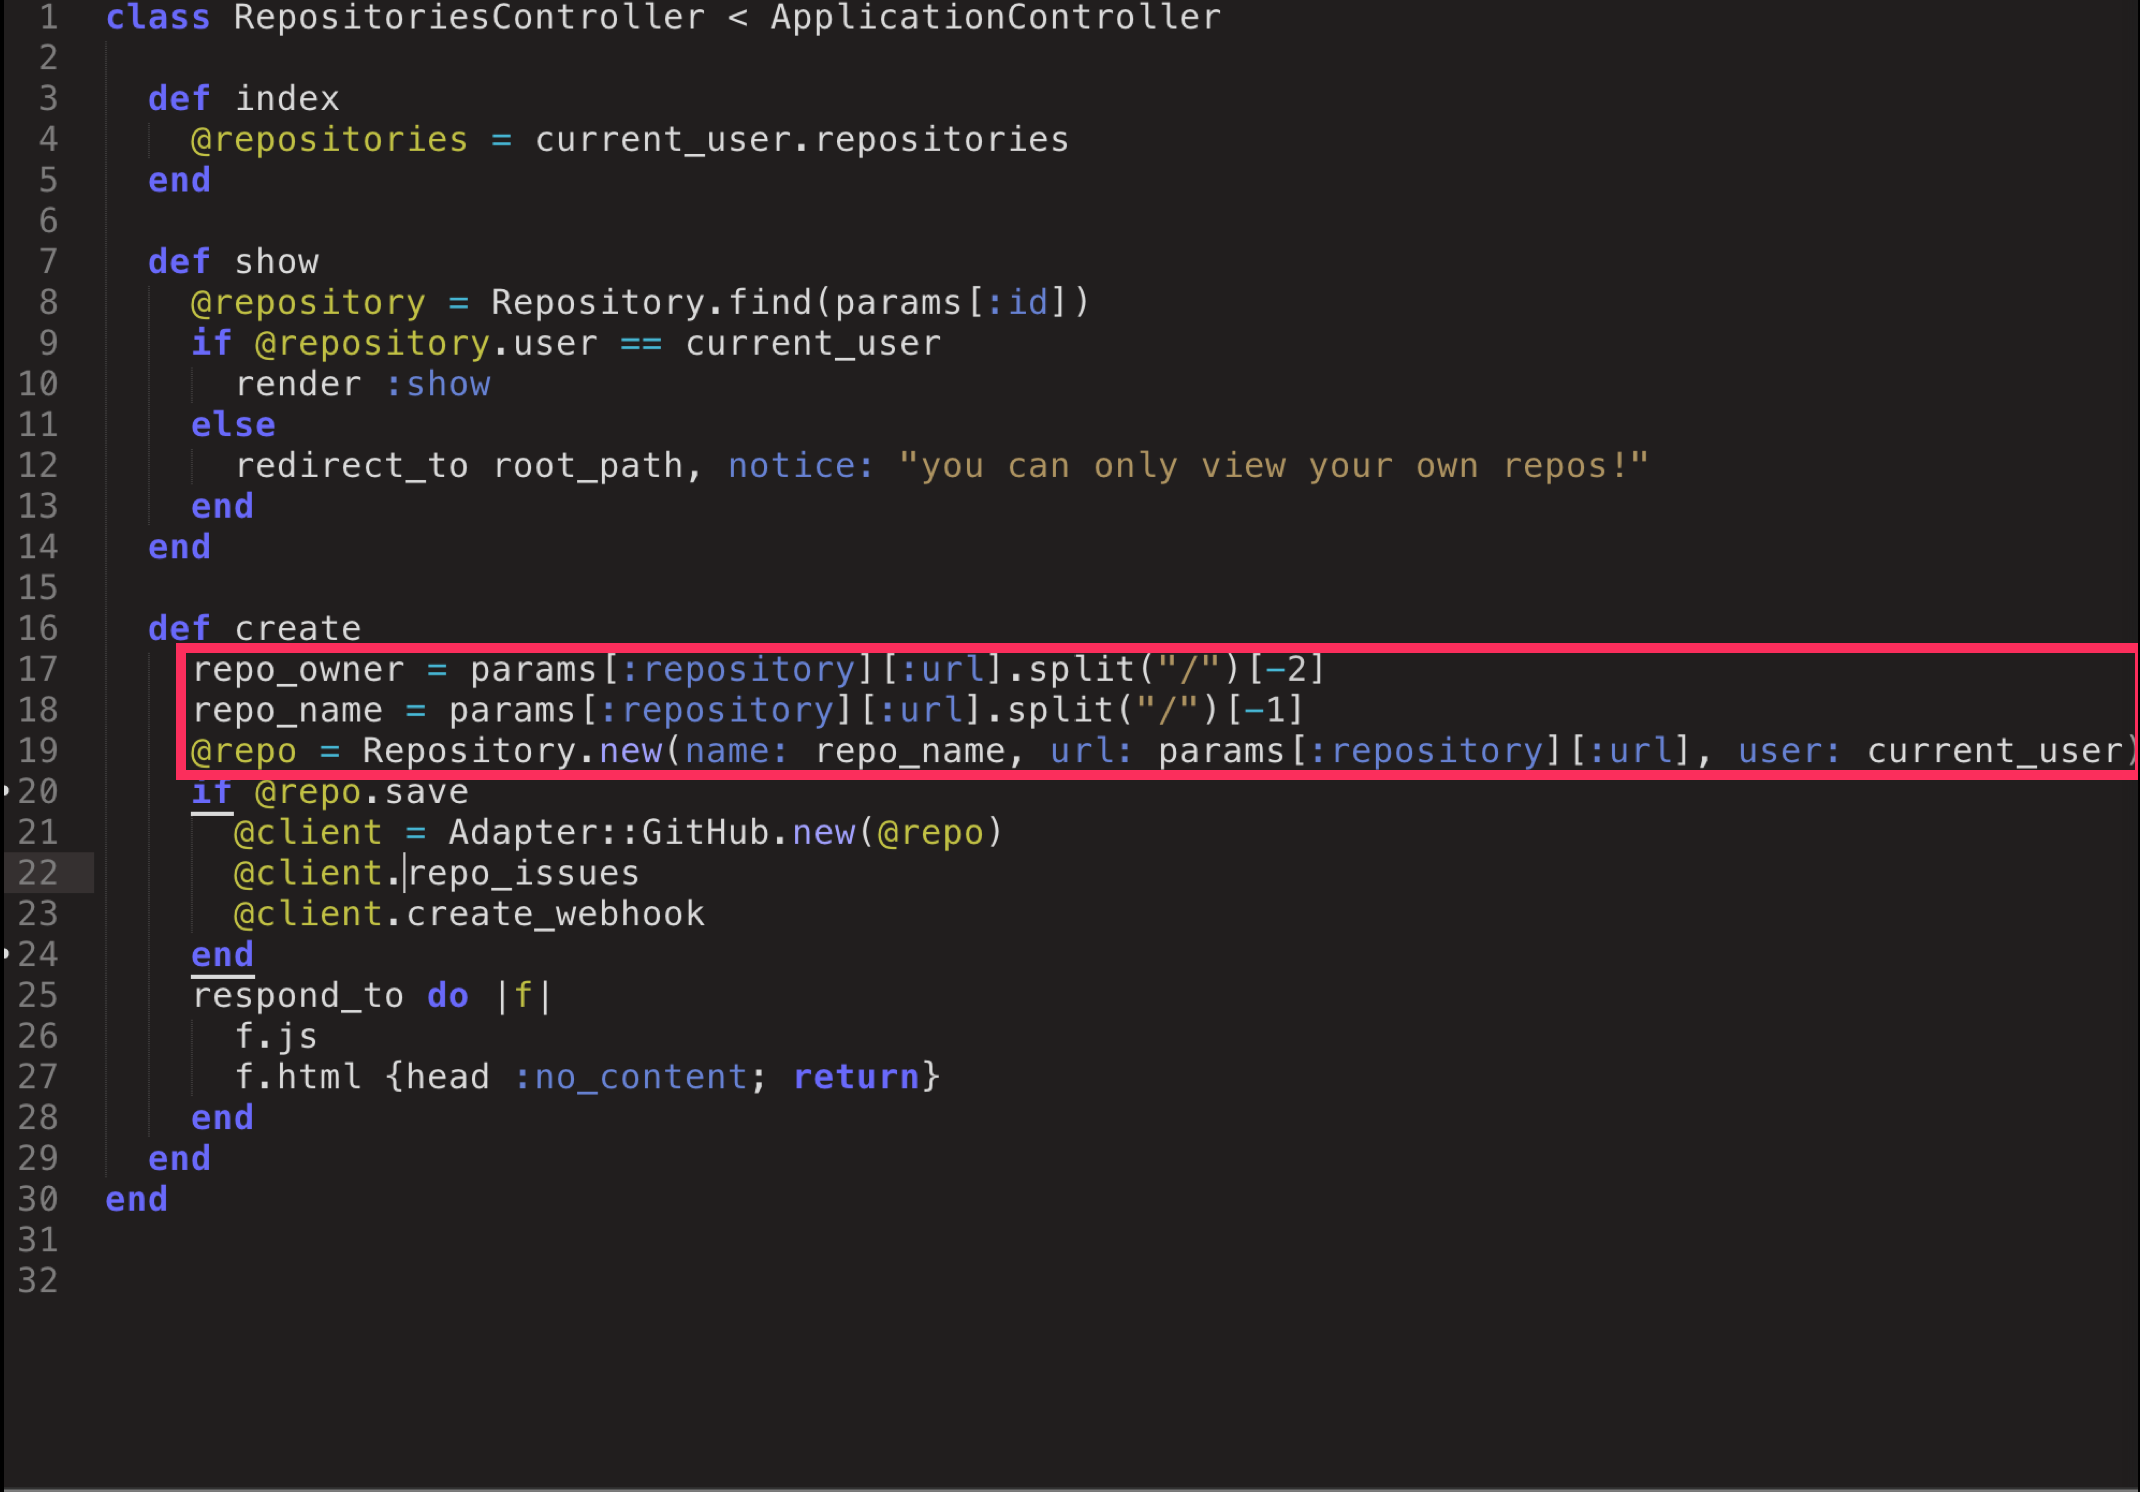
Code Smells
Here we can see that we have to do some string manipulation on our params in order to extract the data we need to create and save a new Repository record.
Fix It
Let's abstract this out into a service object.
- Create a subdirectory,
app/services. - Create a file,
app/services/repo_generator.rb
Here we'll define our service and define a method, #generate_repo, that will contain our extracted code:
# app/services/repo_generator.rb

class RepoGenerator
  def self.generate_repo(params, user)
    repo_owner = params[:url].split("/")[-2]
    repo_name = params[:url].split("/")[-1]
    Repository.new(name: repo_name, url:
      params[:url], user: user)
  end
end
Now, let's use our service object in our controller:
# app/controllers/repositories_controller.rb

def create
  @repo =RepoGenerator.generate_repo(repo_params,
    current_user)
  if @repo.save
    @client = Adapter::GitHub.new(@repo)
    @client.repo_issues
    @client.create_repo_webhook
  end
  respond_to do |f|
    f.js
    f.html {head :no_content; return}
  end
end
Much cleaner!
The Issue Updater Service
Let's do the same type of clean up on our WebhooksController.

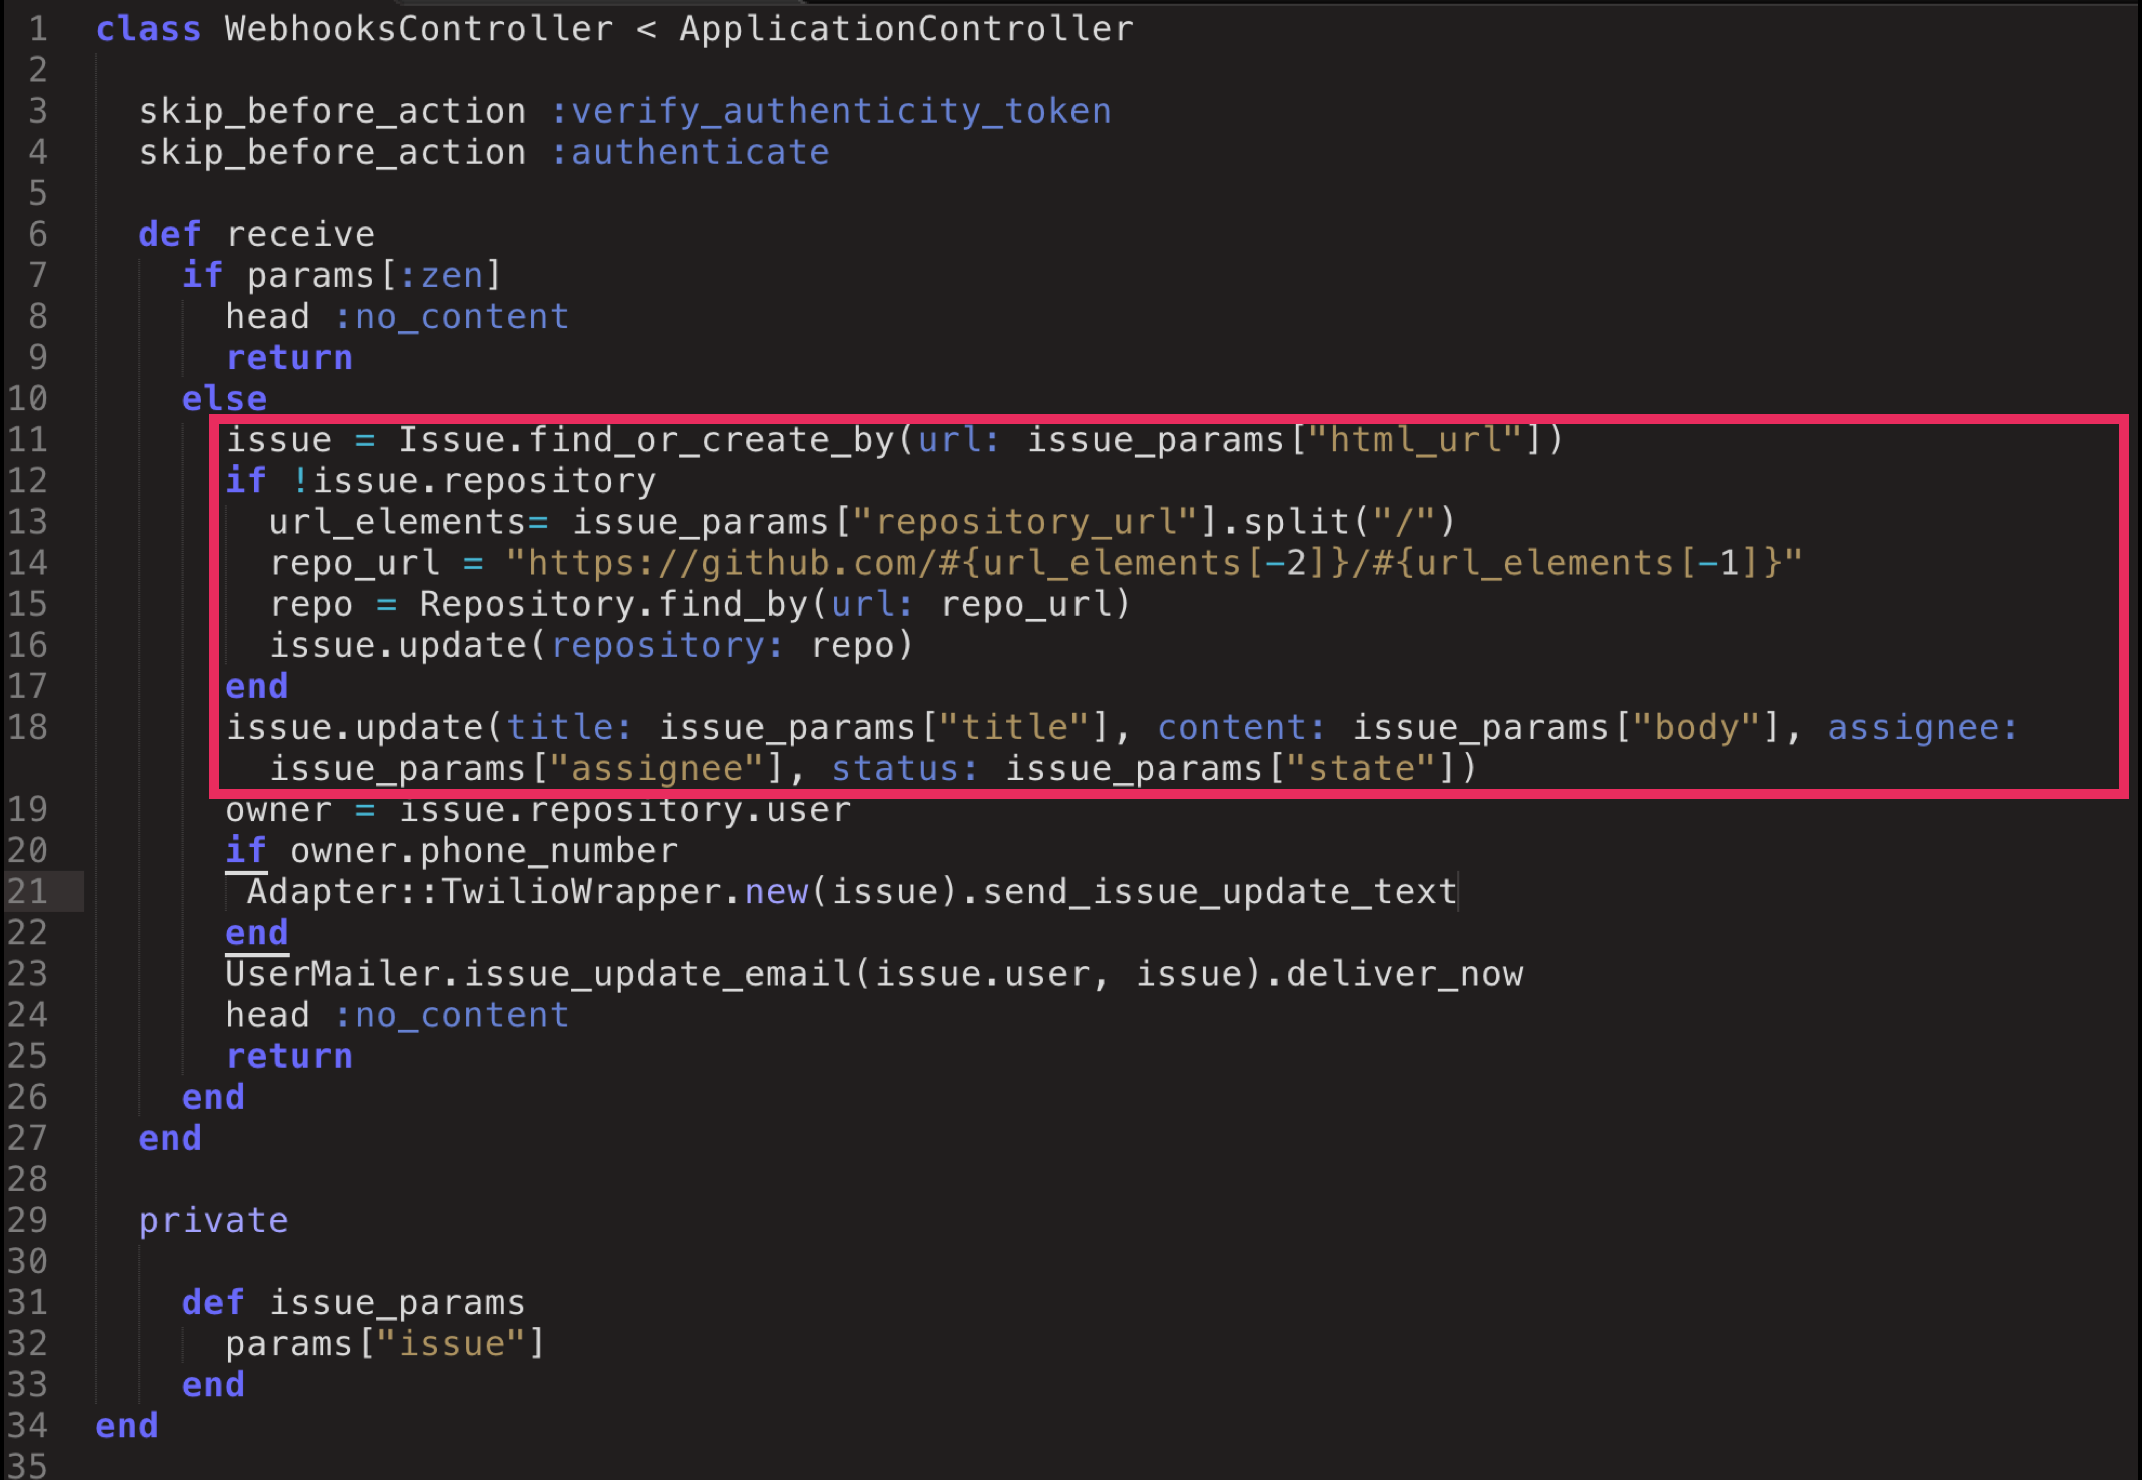
Code Smells
Here, we have a lot of messy logic surrounding how we update or create an issue, given the payload sent to us from GitHub (thanks to our webhook).
We are also carrying out two tasks: that of updating the issue's repository and updating the issue's own properties.
And, on top of all that, just like in our original Repository creation code, we're manipulating strings of data to retrieve the info we need to create new records.
Let's build a service to handle all of this for us.
Fix It
- Create a file,
app/services/issue_updater.rb
Here we'll define our service object class with a method #update_from_payload.
We'll also define a helper method, #update_issue_repo, to handle the job of finding or updating the issue's repository (in this app, an issue belongs to a repository and a repository has many issues). That is really a separate job that needs to occur in order for an issue to be properly updated.
# app/services/issue_updater.rb
class IssueUpdater

  attr_accessor :issue

  def initialize(payload)
    @payload = payload
    @issue = Issue.find_or_create_by(url:
      @payload["html_url"])
  end

  def update_from_payload
    update_issue_repo unless issue.repository
    issue.update(title: @payload["title"],
      content: @payload["body"], assignee:
      @payload["assignee"], status:
      @payload["state"])
    issue
  end

  def update_issue_repo
    url_elements =
      @payload["repository_url"].split("/")
    repo_url = "https://github.com/#
      {url_elements[-2]}/#{url_elements[-1]}"
    repo = Repository.find_by(url: repo_url)
    issue.update(repository: repo)
  end
end
Now, let's use our service object in the controller:
# app/controllers/webhooks_controller.rb

def receive
  if params[:zen]
    head :no_content
    return
  else
    issue = IssueUpdater.new(issue_params)
      .update_from_payload
    if owner.phone_number
       Adapter::TwilioWrapper.new(issue)
         .send_issue_update_text
      end
      UserMailer.issue_update_email(
        issue.user, issue).deliver_now
    head :no_content
    return
  end
end
This controller action is starting to look much more organized!
The Issue Notifier Service
There is one other area that I'd like to address here though.

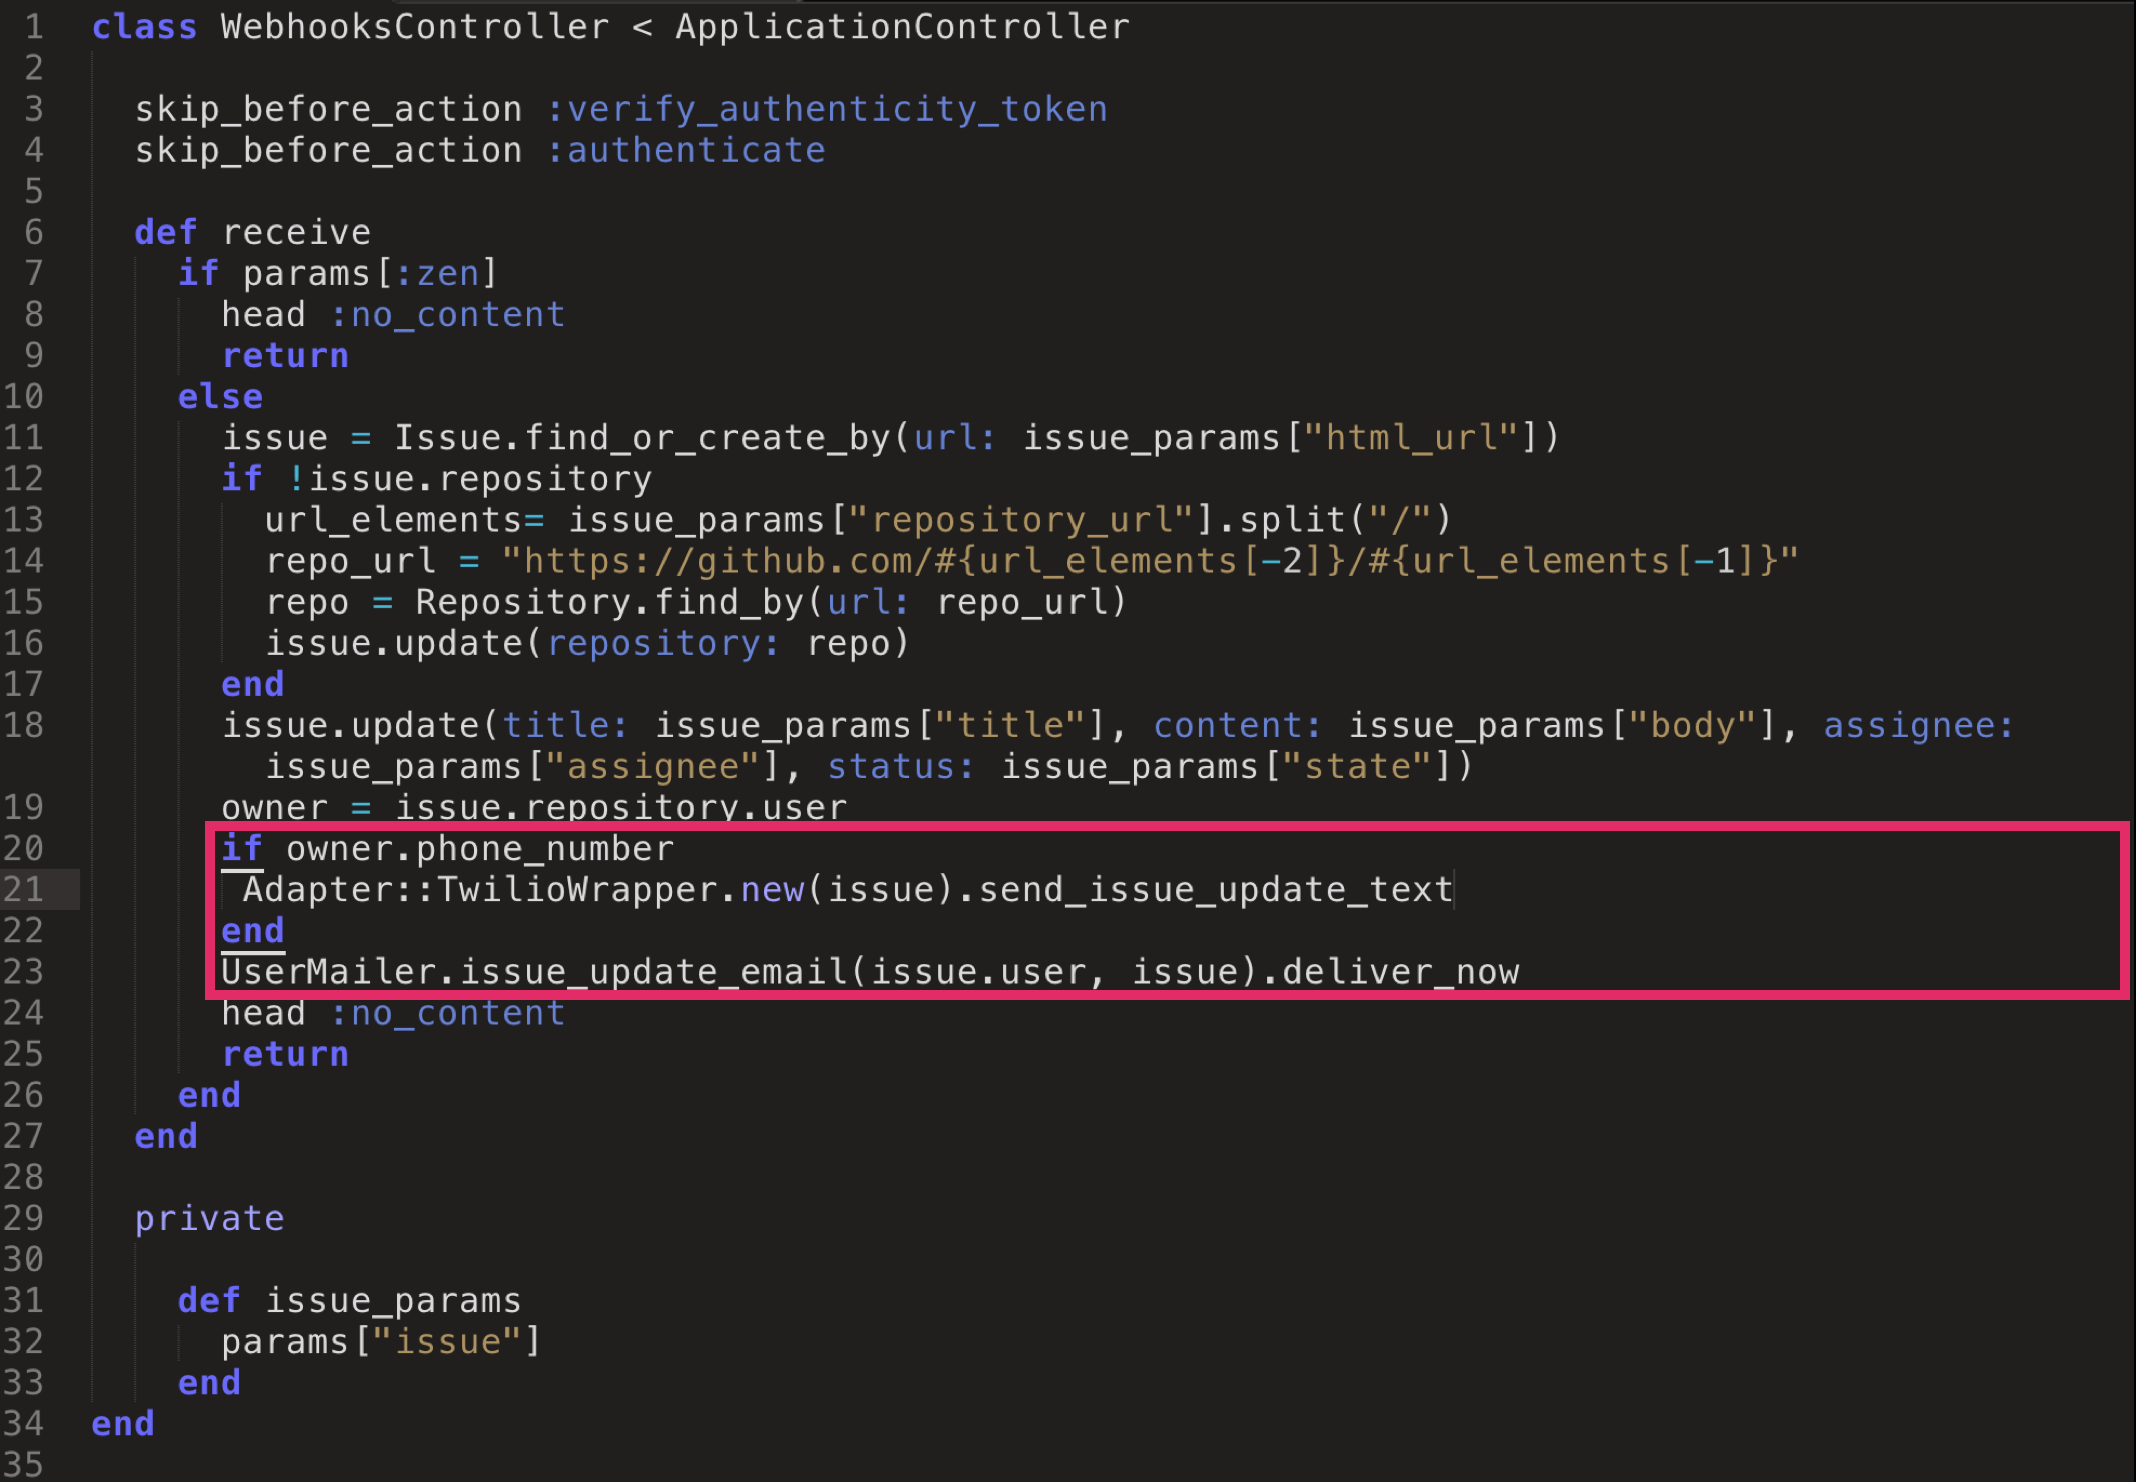
Code Smells
It seems to me that the job of sending the update text and sending the update email fall under the same umbrella––notifying the user of some change to one of their issues.
Fix It
Let's build a service object to wrap up this functionality.
- Create a file,
app/services/issue_notified.rb.
Here, we'll define our service object class and abstract away our code for sending emails and texts.
# app/services/issue_notifier.rb
class IssueNotifier

  attr_accessor :issue

  def initialize(issue)
    @issue = issue
  end

  def execute
    send_email
    send_text
  end

  def send_email
    UserMailer.issue_update_email(issue.user,
      issue).deliver_now
  end

  def send_text
    owner = issue.repository.user
    if owner.phone_number
      Adapter::TwilioWrapper.new(issue)
        .send_issue_update_text(owner)
    end
  end
end
We've defined an #initialize method to set the initial state with the issue instance. We've defined two helper methods, one each for sending email and text. And, we've defined an #execute method, that calls on our email- and text-sending helper methods.
Let's call on our service in our controller.
def receive
  if params[:zen]
    head :no_content
    return
  else
    issue = IssueUpdater.new(issue_params)
      .update_from_payload
    IssueNotifier.new(issue).execute
    head :no_content
    return
  end
end
That looks clean and beautiful!
Coming Up...
Now that our controllers are clean and DRY, and we've build adapters and services to handle the appropriate logic, we'll move on to some view refactoring. In the next post, Part III of this series, we'll learn how to recognize some code smells in the views, and implement the decorator pattern to address them.
